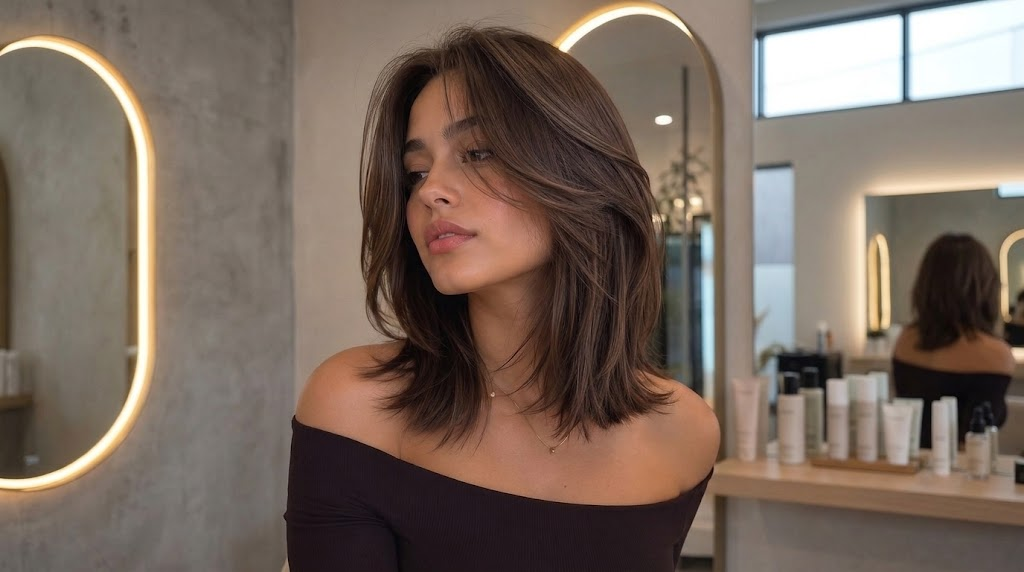
There are easy ways to change a medium-length look without changing its length. If your hair falls between short and long styles, you have room to wear it down or gather it up, depending on the day. Face-framing layers are shorter sections cut around the face that blend into the rest of the hair.
These easy ideas offer styling inspiration for different moods and hair preferences, from relaxed to more polished. Not every look requires a new cut; a change in your part or finish can make familiar hair feel fresh. Choose a next look based on the time and effort you have today, not a perfect picture you feel obliged to copy.
Key Takeaways
- Start with your natural texture and the time you have.
- Change a part or finish before committing to a new cut.
- Use pins or clips to secure shorter pieces in an updo.
- Choose layers and bangs based on how much daily styling you want.
- Try one manageable change before adding another.
The first ideas focus on waves and curls, with simple adjustments that can make them feel relaxed or more defined.
Which Hairstyles For Medium Length Hair Work Best With Waves?
Soft waves can make an everyday outfit feel more put-together without making your hair look overly styled. Medium length works well with waves and curls because the ends stay easy to manage, and the shape can still show movement.
For an at-home hairstyle, choose a loose finish for softness or a defined curl when you want more shape. Keep curl sections fairly even; uneven sections can leave one side polished and the other looking accidental.
Even curl sections help a defined finish look intentional, while a looser finish keeps the shape relaxed.
A loose finish has wider, less uniform bends. A defined curl has a clearer coil or wave pattern, so the difference is mostly in how much separation and shape you leave visible. Try one of these four approaches, then adjust the finish to suit your plans.
- Loose beach waves: Make broad bends, then separate them lightly with your fingers for a relaxed finish.
- Soft S-waves: Shape gentle bends in alternating directions so the hair forms an easy S pattern.
- Mid-length curls: Keep curls consistent from section to section, then loosen only as much as you like.
- Side-part curls: Sweep the part to one side and arrange the curls across the fuller side.
Natural waves can need little more than a careful part and a light touch. If your texture is straighter, choose a finish that does not depend on every bend matching perfectly. A soft, less uniform result can look just as considered as a tidy curl pattern.
When you want less movement and a tidier outline, smooth finishes offer a different way to wear the same length.
How Can You Make Medium Hair Look Sleek?
A deep side part can shift the balance of a smooth style, giving the roots a little lift while softly framing the face. That small change can make a familiar hairstyle feel fresh without changing its length.
A part change can refresh the shape without a new cut. Let the ends move naturally instead of forcing them to look perfectly identical, especially when the cut is designed to swing or curve.
A polished finish can be simple. Decide first whether you want a clean line, a small curve under the chin, or a flick at the ends. Then use one of these cues to shape the outline without chasing a stiff, overly matched result.
- Sleek center part: Draw a straight part and smooth both sides for a balanced, clean outline.
- Deep side part: Move the part farther over, then arrange the fuller side to fall across the forehead.
- Tucked-under ends: Turn the ends slightly inward for a neat curve that sits close to the shoulders.
- Flipped ends: Direct the ends outward for a small flick that adds motion to a smooth finish.
Hair can look polished without every strand sitting in the same direction. A little movement at the ends keeps the style from feeling rigid, while a clean part gives the shape definition. If one side naturally falls differently, work with that difference rather than trying to press it flat.
Small changes to the outline create a neat look; layers and bangs can make the framing itself more noticeable.
Which Layers and Bangs Add Movement?
If you want a visible refresh but do not want to lose much length, changing the shape around the face can make a clear difference. Layers and bangs add movement while leaving much of the overall length in place.
Bangs need separate attention at the front, so choose them only if you are willing to style that area. A dramatic fringe can feel like a bigger change than the rest of the cut, even when the ends remain long.
Bring a reference that shows the amount of movement you like, not only a model with similar hair. The shape can be adapted to your texture, but the front still needs a little daily care if you want it to sit in a specific direction.
- Curtain bangs with waves: Let the fringe part at the center and blend into loose movement along the sides.
- Wispy bangs with straight ends: Keep the fringe light, then leave the ends smooth for contrast.
- Shaggy layers: Choose a piecey outline that encourages movement instead of one solid edge.
- Butterfly-style face-framing layers: Ask for shorter pieces around the face that blend into longer lengths.
Those options create different levels of change. Wispy bangs can feel subtle, while a fuller fringe puts more focus on the front. Layers can also be placed to keep fullness near the ends or to create more movement through the middle.
When you would rather keep hair off your shoulders, the same medium length can gather into an updo.
What Easy Updos Work With Shoulder-Length Hair?
Before heading out on a warm day, you may want your hair off your shoulders without spending a long time arranging it. Medium-length hair can be gathered into a bun or twist, even if a few shorter pieces need extra help staying put.
Pins can secure shorter pieces that escape, and an updo does not need to look perfectly smooth to feel polished. A little texture can make a bun or twist look relaxed rather than unfinished.
Choose how much hair you want gathered before you start. Half-up styles keep some length around the shoulders, while a bun or ponytail clears more space. These four options suit different levels of formality and effort.
- Half-up twist: Take two sections from the temples, twist them back, and secure them together.
- Low bun: Gather hair at the nape, twist it into a small bun, and pin the ends in place.
- Messy top knot: Pull hair high, wrap it loosely, and pin any ends that do not tuck in.
- Sleek ponytail: Gather hair at a height that feels comfortable, then smooth the sides with your hands.
Shoulder-length ends may not wrap around a bun as many times as longer hair. That is fine: a smaller bun with a few pins can hold more securely than pulling hard for a larger shape. Check the back with a mirror before you leave, especially if you are using a twist.
For regular mornings, a relaxed option that needs less gathering and pinning can be easier to repeat.
Which Quick Hairstyles Suit Busy Mornings?
If you need your hair out of the way fast, choose a style you can secure without carefully arranging every section. Easy hairstyles for medium length should match the time you have, so a quick clip can work better than a look that needs several pins.
Do not try to secure all your hair with one small clip when the style needs more support. A clip that is too small can slip, so use a larger one or split the hair into sections.
Each of these options can be adjusted to the amount of effort your morning allows. Keep the shape loose if you are short on time, and take an extra moment to check that the hair feels secure before you leave.
- Claw-clip twist: Twist the hair upward and fasten it with a clip that holds the gathered section.
- Low braid: Braid loosely from the nape, then secure the end with a small elastic.
- Loose pigtails: Divide the hair into two sections and tie each one low for a relaxed finish.
- Headband tuck: Place a headband over the hairline and tuck the ends around it in small sections.
These styles do not have to look exact on both sides. A low braid can stay soft, and a clip twist can leave a few pieces loose around the face. The practical test is whether the style stays comfortable through your morning, not whether every strand sits perfectly.
Once you know how much time you have, natural texture can help you narrow down which finish takes the least effort.
How Should You Choose a Style for Your Hair Texture?
The easiest medium-length hairstyle usually works with the texture already present in your hair. Straight hair may need added shaping for waves, while wavy or curly hair can often use its existing pattern.
Natural texture can make styling quicker, but a mismatched reference photo can lead to frustrating results. A picture of smooth waves may require a different approach from your natural curl pattern, even when the length looks similar.
Straight Hair
Straight hair can suit sleek finishes, tucked ends, or added waves. If you want movement, plan for a little extra shaping instead of expecting a wave to appear on its own. A simple finish that follows the hair’s natural fall may take less effort each morning.
Wavy Hair
Wavy hair can often keep its natural bends, with small adjustments to make the shape more even. Wavy curly hair may have different patterns in different areas, so compare the result from both sides before choosing a reference. The table offers a starting point, not a rule.
| Hair texture | Easy finish | Styling approach | Common snag |
|---|---|---|---|
| Straight | Smooth ends | Shape the outline lightly | Waves may need added shaping |
| Wavy | Loose natural waves | Work with existing bends | Some sections may wave more |
| Curly | Defined natural curls | Keep the curl pattern intact | Uneven sections can change the shape |
A good styling choice does not have to copy a photo exactly. Look for the part you like, such as the overall length or how the ends sit, and adapt that detail to your own texture. The result is more likely to feel comfortable and repeatable.
After texture, consider how the outline around your face affects which options feel right to you.
Which Medium-Length Styles Suit Different Face Shapes?
Face-shape suggestions are options, not restrictions. Movement and gentle framing can help you explore a new style, but your texture and personal preference matter more than a chart.
Do not choose a fringe solely because a face-shape guide recommends it. Bangs can change how a style feels day to day, so consider how they sit with your natural texture and how much time you want to spend on the front.
Round and Oval Faces
Round faces can be framed with movement that gives the outline a little length or softness. Layers that begin below the cheek area can draw the eye down, while fringe that parts or sweeps aside can avoid making the front feel too closed in. These are possibilities, not rules.
Oval faces can accommodate a wide range of styles. You might choose a stronger fringe, longer layers, or a smooth outline based on the finish you enjoy. Think about whether you want the hair to soften the face, add motion, or create a clean frame.
Square Faces
Soft lines around the face can balance a more angular outline. Loose bends, curved ends, or face-framing pieces can make the overall shape feel less severe without hiding your features. If you prefer straight hair, a little softness in the front can be enough.
Diamond Faces
Curls or face-framing pieces can add movement around the cheekbones. You can also keep the sides soft and let the ends provide more fullness, rather than pulling every section tightly away from the face. The best choice depends on how your hair naturally falls.
| Face shape | Framing approach | Options to try | Styling detail |
|---|---|---|---|
| Round | Build vertical movement | Longer layers, side-swept fringe | Keep the outline open |
| Square | Soften the angles | Curved ends, loose bends | Leave movement near the face |
| Diamond | Add movement by cheekbones | Curls, face-framing pieces | Keep side sections soft |
| Oval | Choose by preference | Layers, fringe, smooth ends | Try a wide range of outlines |
A chart can help you name the effect you want, but it cannot decide what you will enjoy wearing. Hair texture, comfort, and your daily routine should guide the final choice. If you like a fringe, for example, plan for its styling needs rather than ruling it out based on a shape label.
Once you know the outline you like, choose a cut that can create that shape and movement.
Which Cut Creates the Shape You Want?
A blunt cut creates a cleaner edge, while a layered cut gives the outline more movement. Choosing between them depends on whether you want the ends to look solid or the shape to feel lighter.
Bring a reference and explain what you want to keep, such as your length or fullness. Asking for layers without saying where they should start can lead to a shape that moves more than you wanted.
Blunt Ends and Lobs
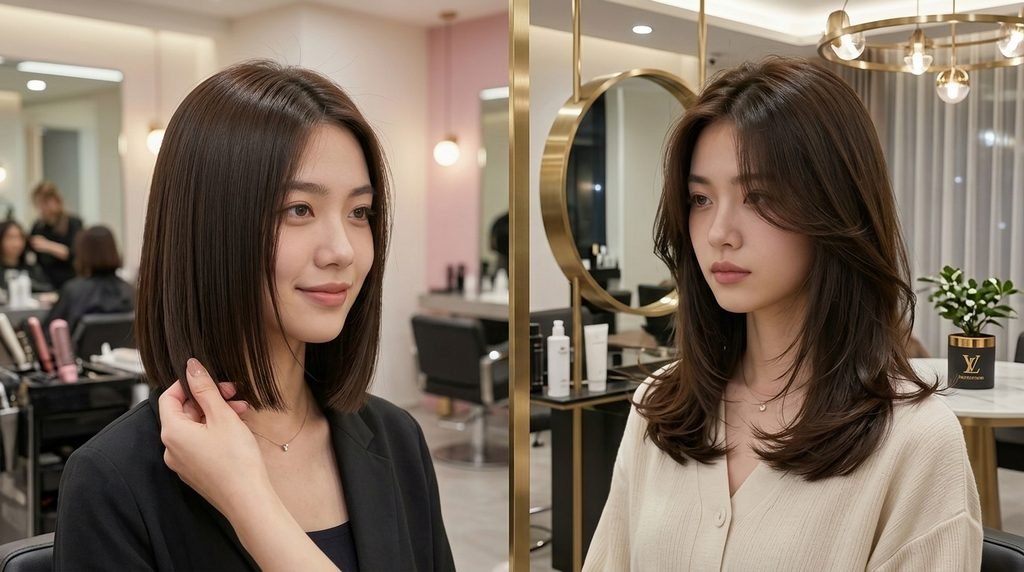
A lob is a long bob that sits around the shoulders. Its outline can be clean or slightly softened, depending on how the ends are cut. A blunt shoulder cut has minimal layering and a straight-across edge, creating a stronger line through the bottom.
These cuts can keep the shape looking full at the ends. Tell your stylist whether you want the length to sit at the shoulders or just above them, since a small change can affect how it falls. A reference photo helps make your preferred outline clear.
Shaggy and Butterfly Layers
Layered cuts create a different outline from a blunt edge. Shaggy layers add movement through the hair, while butterfly layers combine shorter pieces around the face with longer lengths toward the back. Those shorter pieces can frame the face without removing as much length at the back.
Explain where you want the shorter layers to begin and how much fullness you want to keep. A photo alone may not show how the layers sit when the hair is worn naturally. Clear details help your stylist shape the cut around your everyday habits.
With the outline decided, you can add shape without heat when you want a softer, lower-fuss finish.
How Can You Style Medium Hair Without Heat?
For a softer morning finish, prepare your hair the night before with a loose braid or twists. Those methods can create shape without heated tools, as long as your hair dries fully before you take them out.
Damp hair should feel comfortable to wear while it dries, and it should not be tied tightly while wet. A tight tie can pull at the hair and may leave an unwanted crease.
Choose a method based on your starting texture and the result you want. The same approach will not create an identical finish on every head of hair, so treat the first try as a way to learn how your natural pattern responds.
| Method | Starting hair | Finish | Best use |
|---|---|---|---|
| Loose braid | Comfortably damp | Broad bends | Soft waves by morning |
| Overnight twists | Comfortably damp | Smaller bends | More visible movement |
| Air-dried natural texture | Wet or damp | Natural pattern | Keeping existing texture |
| Headband tuck | Dry or slightly damp | Neat tucked ends | Keeping hair off the face |
Leave enough time for the hair to dry before undoing a braid or twist. If it still feels damp, the pattern may not hold as expected. You can loosen the result gently with your fingers instead of brushing through it and losing the shape.
If you want a more controlled result, a heated tool can make the finish more repeatable with careful handling.
How Do You Use Heat for Waves or a Blowout?
Heat can add a more defined, repeatable finish, but it needs careful handling. Waves created with curling devices or other heated tools typically take more time and styling product for hold than working with natural waves.
Use a heat protectant according to its label, choose a setting suited to your hair, and avoid repeated passes over one section. Small sections make the result easier to control and reduce the urge to keep reheating the same hair.
Curling-Iron Waves
Start with dry hair and divide it into sections small enough for the tool to reach evenly. Apply heat protectant as its label directs, then use a temperature setting appropriate for your hair. A setting that feels too hot is not the shortcut to a better finish.
Work through the sections without repeatedly passing over the same piece. Let each curl cool before loosening it with your fingers. Cooling helps the shape settle before you separate the hair, so you can judge the result without immediately brushing out the pattern.
Blowout and Flipped Ends
For a blowout or flipped ends, work on manageable sections and guide the ends in the direction you want them to fall. Keep the heat moving rather than holding it in one place. The aim is a smooth finish with a little movement, not a rigid curl at every end.
Some hair holds a heated wave longer than other hair. Use styling product only as needed for hold, and follow its label. If the finish falls quickly, repeated heat passes may add stress without giving you the lasting shape you want.
Once the finish is shaped, small changes at the roots can add lift and movement to the overall outline.
How Can You Add Volume and Movement?
If the crown looks flat, changing your part can make the top look fuller without changing the cut. A new direction shifts where the hair rests and can alter the outline right away.
Use only a small amount of product near the roots, since too much can weigh the hair down. Root lift works best when the hair still has room to move, rather than feeling coated or sticky.
You can also lift the roots while drying by raising sections gently instead of pressing them close to the scalp. The goal is a little space at the crown, not a fixed shape. Even a small adjustment can make the rest of the hair look less heavy.
If you have curls, let them cool before loosening them. Separating curls too early can reduce definition, while waiting gives the shape time to settle. Then use your fingers to open the pattern only as much as you want.
Layers can support movement, but you do not need a new cut to change how the hair sits. A part switch or light root lift can be enough for a day when the finish feels flat.
Volume changes the overall silhouette; the part and fringe shape how that silhouette frames your face.
Should You Change Your Part or Add Bangs?
A part change is easy to reverse, while bangs are a more lasting commitment because they need time to grow out. Choose a center part or side part for a small shift, and consider a fringe when you want a more noticeable change at the front.
Bangs may need separate daily attention, while changing your part takes only a moment. A styled photo can hide how a fringe sits naturally, so do not decide from the finished picture alone.
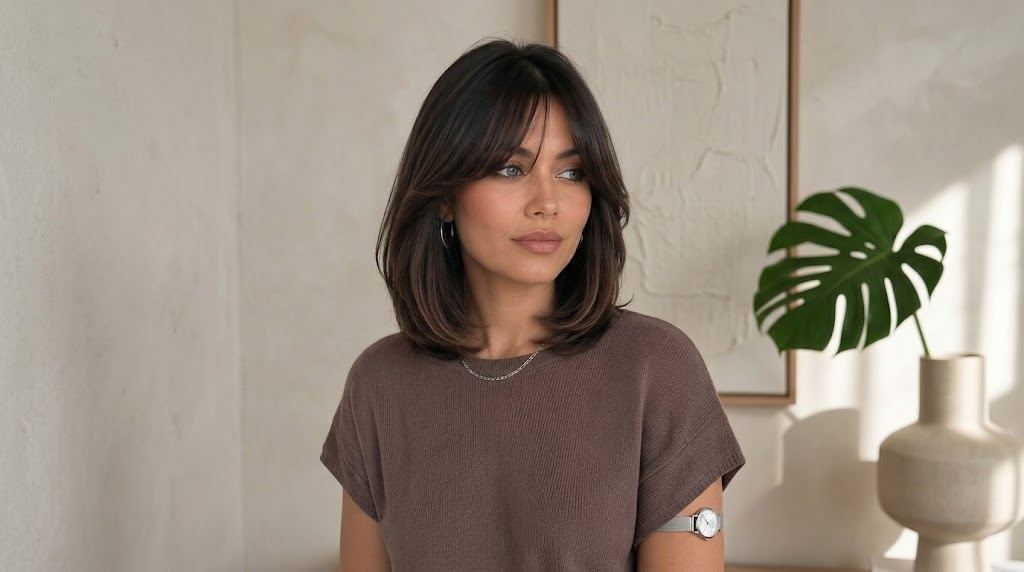
A center part creates an even split and can make the front feel balanced. A side part moves more hair to one side and changes the way the face is framed. Both are simple to try before you make a cut decision.
Curtain fringe opens away from the center and blends toward the sides. Side-swept bangs move in one direction across the forehead. Either can add a new detail, but fringe may need regular shaping and a separate styling step.
Before making a fringe choice, look at how your hair falls when it is dry and worn naturally. A photo with a styled front may not show the daily effort needed to keep it in place. If you are unsure, try a reversible part change first.
Once the front feels right, you can adjust the same hairstyle to suit the day’s plans.
How Can You Adapt a Style for Different Occasions?
A daytime style can work for an evening plan with a changed part, smoother flyaways, or one side secured neatly. Small adjustments can shift the impression without requiring a new hairstyle.
Avoid trying an unfamiliar, elaborate look right before an event. Use a style you already know, then make one change that suits the occasion and still feels comfortable.
The same hair can look casual, work-ready, or dressed up depending on its finish. Start with a familiar shape, then use the table to choose a small adjustment rather than rebuilding the whole look.
| Occasion | Starting style | Small adjustment | Finish |
|---|---|---|---|
| Casual day | Loose waves | Leave the texture relaxed | Easy and informal |
| Workday | Smooth shoulder-length hair | Neaten the part and ends | Polished and simple |
| Evening event | Curls or a sleek finish | Secure one side | More deliberate |
| Active day | Hair worn down | Gather it securely | Comfortable and out of the way |
Smoothing flyaways can make a style feel neater without flattening all its movement. Securing one side can also add a deliberate detail while keeping the rest of the hair down. Pick the adjustment that fits the setting and your comfort.
Choose an occasion finish you can do without rushing, then keep the routine manageable with only the tools you need.
What Tools and Products Do You Actually Need?
Most everyday styles need only a few well-chosen tools: a brush, clips, and a comb can handle many basic changes. Hot tools are optional, so choose them only if you regularly want a finish that needs heat.
Pick products by purpose, such as heat protection, hold, or smoothing, instead of buying a full routine. One product with a clear job is easier to assess than several layers that all claim to shape the finish.
A brush can smooth the hair or help arrange the outline, while a comb gives you a clear part. Clips keep sections out of the way while you style. Those basics are useful whether you wear the hair down or secure it up.
For heat, choose a protectant and follow its label. For a style that needs to last, a hold product may help. A smoothing product can be useful when you want fewer flyaways, but it is not necessary for every texture or finish.
Avoid layering several products before you know which one is doing the job. Try one at a time and notice whether it makes the hair easier to style or leaves it heavy. Keep the items that fit the finishes you actually wear.
With a simple routine in place, the next step is keeping the cut in a shape that remains easy to style.
How Do You Keep a Medium-Length Cut Easy to Wear?
An easy-to-wear cut fits your routine and the way it grows out. The right salon visit depends on whether the outline still works for you and whether you want to keep that shape.
At your next appointment, describe what has become difficult to style. If you want to preserve a shape, show how you normally wear your hair, not only a carefully styled reference.
A cut stays easier to wear when its shape fits your routine and the way it grows out.
A cut may change as it grows, especially when layers or a fringe shape the outline. Pay attention to what bothers you in daily styling: ends that turn out, front pieces that need constant adjusting, or layers that no longer sit as you like.
Those details are more useful than saying only that the hair feels too long or too full. Bring a photo of your usual finish and point out what you want to keep. That gives your stylist a clearer picture of how the cut works in real life.
You do not need to change everything at once. A small adjustment to the ends or front can make the shape easier to manage while keeping most of the cut familiar.
Choose one manageable change and try it before deciding whether your hair needs another.
Conclusion
Medium length can support both casual and polished finishes, so your next hairstyle does not have to involve a dramatic change. The easiest starting point is a look that works with your natural texture and fits the time you have.
Save one reference photo that shows a detail you like, such as the part or the outline. Try that change or a simple styling option first, then decide whether you want to do more. Pick one idea to test this week.
FAQ
How do I make medium-length hair look good every day?
Start with your natural texture and choose a repeatable part or finish. A routine you can do without rushing is easier to keep than a complicated style that looks good only once. Keep a brush, comb, or clip nearby for small adjustments, and change one detail when you want a fresh look.
What is the easiest way to curl shoulder-length hair?
Work in small sections and let each curl cool before loosening it. No single tool or curl pattern suits every texture, so choose a setting appropriate for your hair and avoid reheating the same section repeatedly. If you want a softer result, separate the curls gently with your fingers after they cool.
Can medium-length hair go into a ponytail?
Yes, medium-length hair can be gathered into a ponytail. Some shorter pieces may slip free, especially near the face or nape, so use pins or clips to secure them. Choose a height that feels comfortable and gather the hair without pulling tightly. A few loose pieces do not mean the style has failed.
How do I add waves to medium hair without a curling iron?
Try a loose braid or overnight twists on comfortably damp hair, then allow it to dry fully before taking them out. Damp hair should feel comfortable while it dries, and tying it tightly while wet can leave an unwanted crease. Loosen the finished shape gently with your fingers rather than brushing it out.
Are layers or a blunt cut better for fine hair?
Blunt ends can create a stronger outline, while layers add movement. The better choice depends on the shape you want and how you usually wear your hair. If you want fullness at the ends, ask about keeping a solid edge; if you want more motion, explain where you would like shorter layers to begin.
How can I keep bangs out of my face as they grow?
A side sweep, small clip, or headband can keep growing bangs away from your face. Choose a method that holds them without pulling uncomfortably, especially if you wear it for hours. You can also part the fringe and tuck each side back, then adjust the hold as the pieces gain length.