

If you want Glowy Makeup Looks that feel fresh without looking heavy or oily, a few light layers can make the difference. Maybe your makeup looks flat by lunchtime, or a shiny base feels uncomfortable before you even leave home. A comfortable glow can be subtle enough for a regular day or more polished for an evening out.
Skin prep, light layers, and targeted setting help keep a dewy finish from turning greasy. You do not need a complicated routine or a full new makeup bag. Start with what you have, then adjust the amount of radiance after you see how it wears on your skin.

Key Takeaways
- Choose a level of glow that feels right for your plans.
- Give hydration and sunscreen time to settle before makeup.
- Build coverage with thin layers instead of applying too much at once.
- Add shine only where you want light to catch.
- Use powder selectively to help makeup stay comfortable through the day.
The routine moves from skin prep to complexion, color, and finishing touches. First, it helps to know what separates a dewy finish from excess shine.
What Defines Glowy Makeup Looks?
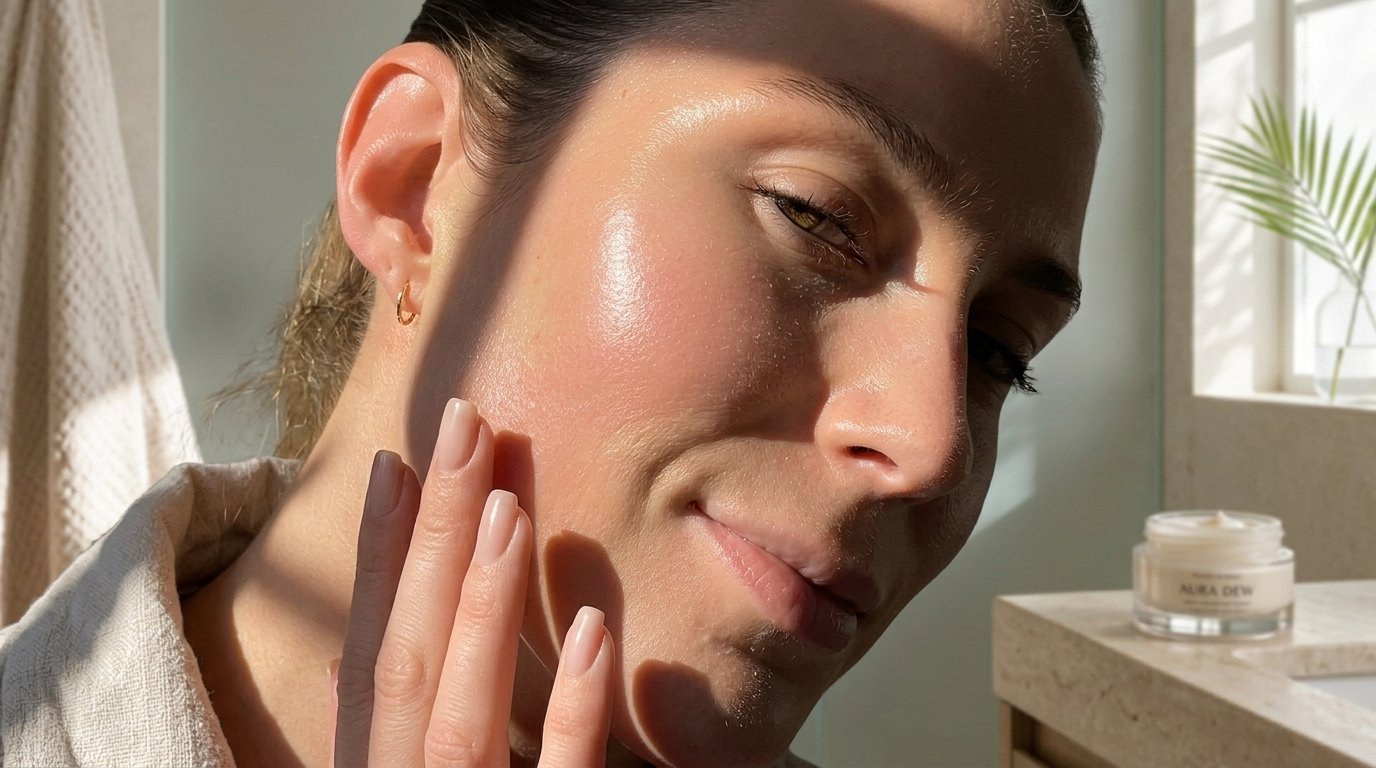
A dewy finish gives skin a hydrated, luminous look without the uniformly glossy appearance associated with glass skin. The difference is how evenly light reflects: dewy makeup has a soft, skin-like sheen, while a glassy makeup look appears smoother and visibly glossy. Glassiness is a style choice, not a requirement for a fresh glow.
A dewy finish looks luminous without coating the whole face in a uniform gloss.
The high points of the face are the areas that naturally catch light, such as the cheekbones, brow bones, bridge of the nose, and cupid’s bow. A glow can stay mostly on those areas, leaving the rest of your face with a more natural finish.
Natural radiance versus glassy shine
A dewy makeup look keeps the skin’s dimension visible, so its shine does not need to look perfectly even. Glassy shine is more uniform and deliberate. Satin sits between the two, with a restrained sheen that feels less flat than matte makeup but less reflective than a dewy makeup look.
| Finish | Appearance | Best suited to |
|---|---|---|
| Dewy | Soft luminous sheen | Everyday natural radiance |
| Glassy | Smooth and visibly glossy | An intentionally high-shine look |
| Satin | Restrained sheen between matte and dewy | A balanced finish |
Choose the glow level you want
For a minimal daytime look, keep the sheen subtle and close to the skin’s natural dimension. For a more polished look, add more reflected light while keeping the overall finish comfortable. Your preferred makeup look can shift with the setting, the light, and how much shine you enjoy seeing in the mirror.
Use this as your standard: aim for a soft sheen if you want natural radiance, and choose glassy shine only when you want a visibly glossy effect. Once you know the finish you prefer, you can prepare skin to support it.
Prep Your Skin for a Dewy Base
Makeup tends to sit more evenly when skin feels comfortable and hydrated, rather than tight or slick. Simple, well-settled layers can help reduce the chance that complexion products cling to dry patches or slide over excess skincare. Apply skincare from thinner to thicker textures, then let it absorb before makeup.
A cleanser removes leftover makeup, oil, and daily buildup. Choose one that leaves skin feeling comfortable, not stripped. A hydrating serum is optional, but a formula with hyaluronic acid can add moisture to your routine. The right ingredients matter less than choosing products that feel good on your skin.
Build a simple hydration routine
Use a moisturizer that suits your skin, then finish daytime skincare with sunscreen. Sunscreen belongs in the morning routine even when you plan to wear makeup with SPF, since makeup is not a replacement for sunscreen. You can keep the routine short; adding more products does not automatically improve hydration.
- Cleanse with a comfortable, gentle-feeling cleanser.
- Apply an optional hydrating serum, such as one with hyaluronic acid.
- Moisturize to help skin feel comfortable.
- Apply sunscreen as the final daytime skincare step.
Give skincare time to settle
Let moisturizer and sunscreen absorb before applying makeup. If the surface still feels wet or slippery, makeup may move around instead of blending smoothly. Waiting until the layers feel settled also helps you notice whether you used more product than your skin needs.
Exfoliation is optional, not a step you need to force into every routine. Avoid exfoliating skin that feels irritated, and follow the directions for any exfoliant you use. With a comfortable, prepared canvas, you can choose a complexion formula that gives you the coverage you want.
Choose a Skin Tint or Foundation
Start with the lightest coverage that meets your needs, then add more only if you want it. A skin tint or tinted moisturizer may suit a sheer result, while foundation may work better when you want more coverage. Coverage varies by formula, so product type alone does not guarantee a particular finish.
Skin tints and tinted moisturizers generally offer lighter coverage than many foundations, but their coverage and finish vary. Think about whether you want to even out the overall look of your skin or cover more visible discoloration. That choice can help you avoid a base that feels heavier than you prefer.
Match coverage to the look you want
A skin tint can work well when you want a barely-there base that leaves natural variation visible. Tinted moisturizer may suit you if you prefer light coverage with a moisturizing feel. Foundation can offer more adjustable coverage, depending on its formula and how you apply it.
| Product type | Typical coverage tendency | Useful when |
|---|---|---|
| Skin tint | Sheer | You want a barely-there base |
| Tinted moisturizer | Sheer to light | You want light coverage with a moisturizing feel |
| Foundation | Light to full depending on formula | You want more adjustable coverage |
Look for a finish that suits your skin
For a radiant look, check for a radiant or satin finish on the product description. Either can give your skin a little dimension without forcing you into a highly glossy result. These are useful tendencies, not guarantees: the same formula can look different depending on your skin and how much you apply.
Check the shade in natural light when you can, since indoor lighting can make a mismatch less obvious. Look at the color along your jaw and face rather than judging a swatch on your hand alone. Once you have a formula and shade that suit you, apply it in a thin, even layer.
10 Easy Home Workouts for Women to Stay Fit and Feel Strong
Apply Your Base in Thin Layers
Start with a small amount of skin tint or foundation around the center of your face, where you may want the most coverage. A little goes further when you spread it outward across the cheeks, forehead, and chin. Build coverage in thin layers instead of applying a thick coat all over.
A damp sponge can soften the look of liquid or cream makeup, while fingers offer a quick, controlled way to work with the product. Use light pressure and blend toward the edges of your face so the base does not stop in a visible line. Choose whichever method feels easiest to control.

- Dispense a small amount of base onto your fingertips or a clean palette.
- Apply it from the center of your face outward.
- Blend with your fingers or a damp sponge, especially near the hairline and jaw.
- Pause to assess your coverage before adding more product.
- Add another thin layer only where you still want extra coverage.
Check your face in natural light if possible, since indoor lighting may hide uneven patches. If the base looks even, you have no reason to cover every area again. The mistake to avoid is applying a thick coat everywhere before checking whether you need more coverage.
When the base looks even, move to pinpoint concealing rather than adding more foundation across the whole face. That keeps the complexion light while giving specific areas a little extra help.
Conceal Only Where Needed
Your base can look good overall while one small area still needs evening out. Tap a small amount of concealer onto under-eye darkness, a blemish, or another spot that needs extra coverage. Keep the product focused instead of spreading it across skin that already looks even.
Use a shade suited to the area and add concealer gradually. A shade close to your skin can help cover a blemish; an under-eye area may call for a shade that blends naturally with the surrounding face. The best choice depends on what you are trying to even out.
Use a fingertip or small brush to tap concealer into place, then blend the edges without rubbing away the base underneath. If you need another pass, add a little more only after the first layer settles. A smaller amount gives you more control over coverage and texture.
Piling on concealer can make texture more noticeable, especially when an area needs less product rather than more. If coverage looks heavy, soften the edges or remove a little instead of adding another layer. With targeted areas evened out, you can bring warmth and color back into the complexion.
Add Blush and Bronzer for Dimension
A little blush can bring color back after complexion makeup makes your face look more even. Cream or liquid blush adds a fresh wash of color that can blend into a dewy finish. Start with a small amount, then build until the color suits your look.
Build blush and bronzer gradually so they add dimension without overwhelming the base. A sheer first layer is easier to adjust than a strong patch of color. You can use fingertips or a brush, depending on the formula and the level of control you want.

Place blush for a fresh flush
Place blush where you like to see color, such as the apples of your cheeks or slightly higher toward the cheekbones. The best spot can change with your features and the effect you prefer. Blend the edges until the color looks like part of your skin, not a separate stripe.
Liquid and cream blush can create a fresh-looking wash, though a powder blush can work too. Add a little at a time, and pause between layers to check the color. If the result looks stronger than you wanted, soften it with a clean sponge or fingertips.
Use bronzer to add warmth
Blend bronzer around the perimeter of your face and across the areas where you want warmth. That might include the temples, outer forehead, or along the cheeks. Use a light hand and follow the shape of your face rather than forcing the same placement on everyone.
Choose a shade and finish that look natural to you, then blend the edges into the base. A strong stripe of bronzer without blending can stand apart from the rest of your makeup. Once blush and bronzer have added color and dimension, you can place light more deliberately.
Place Highlighter on the High Points of the Face
Use highlighter sparingly on selected areas rather than sweeping it over your whole face. A thin layer on the high points of the face gives light a place to catch without making every area reflective. Keep the sheen controlled by applying highlighter with your fingertips or a small brush.
A subtle, finely reflective shade tends to look more natural than chunky sparkle. Pick the spots that suit your features and skip any area where you would rather not draw attention. There is no need to highlight every point just because the product is designed for it.
- Cheekbones, where a soft sheen can follow the shape of the face.
- Brow bones, for a small touch of reflected light.
- Bridge of the nose, if you want a narrow highlight there.
- Cupid’s bow, for a subtle accent above the lip.
Blend the edges of each small placement so the highlighter melts into the makeup around it. If the result looks too bright, tap over the edge with a clean fingertip to soften it. A high points face map can be a starting point, not a checklist you must complete.
The phrase “points face” may appear in search, but your placement can stay simple: cheekbones, brow bones, nose, or cupid bow. Choose only the areas you enjoy seeing with extra light. With the complexion glow in place, move on to the optional eye and lip details.
Finish the Eyes and Lips
For a minimal finish, groom your brows and choose a neutral eye shade; for more definition, give your eyes or lips a bolder touch. Keep the balance personal so the details complement your complexion instead of competing with it. A simple daytime look can be complete with just a few small choices.
A glossy lip is optional, not necessary for a dewy face. A comfortable lip balm, gloss, or lip color can suit the look, depending on what you enjoy wearing. You can also leave your lips understated and let the rest of your makeup set the mood.
Keep brows groomed with a brush or a brow product if you like a more defined shape. Neutral or softly shimmery eye shades add a little light without taking over the face. For daytime, you might pair a soft brown shade with balm, then choose a stronger lip color for a dressed-up evening version.
A more defined eye or a bolder lip can shift the same complexion base toward a polished look. You do not have to change every detail to make that shift. Once you have the style you want, focus on keeping the finished makeup comfortable and in place.
Set a Dewy Makeup Look to Last
Lasting dew comes from selective setting, not coating your whole face in powder. Use a small amount of translucent powder on oily areas such as the T-zone, which includes the forehead, nose, and chin. Leave the cheekbones lighter if you want to keep their glow.
Powder only where shine tends to break through, then mist setting spray evenly if you use it. A setting spray can help finish the makeup without covering the whole face with powder. Let the mist dry on its own, and avoid touching your face while it settles.
Powder only where you need it
Press a small amount of translucent powder onto the T-zone with a puff or brush. Start lightly, then add more only if the area still feels too slick. Avoid over-powdering the cheekbones, since doing so can mute the radiance you placed there.
| Situation | Setting approach | Keep the glow by |
|---|---|---|
| Oily T-zone | Lightly powder the area | Leave cheekbones unpowdered |
| Dry patches | Avoid adding powder over flaky texture | Use a light mist if needed |
| All-over finish | Apply setting spray evenly | Let it dry without touching |
Finish with spray and refresh gently
Mist setting spray across your face in an X motion to spread it evenly. Keep the spray at the distance stated on its label, then let it dry without fanning or pressing your hands against your skin. If you prefer not to use spray, selective powder can still help reduce unwanted shine.
- Use a gripping primer if you want one.
- Apply makeup in thin layers.
- Powder oily zones sparingly.
- Blot instead of rubbing.
During the day, blotting papers can lift excess shine without shifting as much makeup as rubbing might. Press or pat the paper onto oily areas, then lift it away. Adjusting the balance by area can keep the finish comfortable, so next consider what your skin needs.
Adjust the Glow to Your Skin’s Needs
The same makeup routine can behave differently across your face and from person to person. Dry-feeling skin may prefer comfortable hydration and thin cream layers, while oily areas may feel better with glow limited to selected zones. Let comfort guide the balance, rather than treating one finish as right for everyone.
Use less shine or coverage wherever it feels uncomfortable or draws attention you do not want. If you have combination skin, use different amounts of powder on different areas instead of setting your whole face the same way. Your skin can also change from one day to another.
Choose glow placement and coverage by what feels comfortable on your skin, not by a one-size-fits-all rule.
Reflective products may make texture or irritation look more noticeable. If that happens, skip highlighter on the area you would rather not emphasize, or choose a less reflective formula. You can still keep a fresh finish elsewhere on your face.
Think of the routine as adjustable, not prescriptive. Use more hydration when your skin feels dry, and keep the T-zone lightly set when it feels oily. Choose glow placement and coverage according to comfort, then make one small change at a time.
Conclusion
A fresh finish depends on balance, not on using the most product. Light layers help keep your makeup comfortable, while carefully placed glow lets you choose where radiance shows. If you need powder, focus it on oily areas instead of covering the whole face.
Try the routine with products you already have, then check the result in natural light. You may find that one less layer or a smaller highlight makes the finish feel more like you. Make one small adjustment in your next makeup routine and see how it wears through the day.
FAQ
Should I exfoliate before every dewy makeup application?
No, exfoliation is optional, and you do not need it before every makeup application. Exfoliating irritated skin can make discomfort worse, so skip it when your skin feels sore, raw, or unusually sensitive. If you use an exfoliant, follow the directions on its label and avoid adding extra steps just to make makeup look smoother.
Can I mix facial oil into foundation for extra glow?
Yes, a drop of facial oil can add sheen, but test that combination first. Mix a small amount with the foundation in your hand and check whether it still spreads evenly and feels comfortable. Some formulas may separate or feel heavy when mixed with oil. Skip the mix if it makes your base look greasy or slide around.
Can I wear sunscreen under dewy makeup?
Yes, apply sunscreen as the final step in your daytime skincare routine and let it settle before makeup. This gives the layers time to absorb and helps reduce a slippery feel under your base. Makeup labeled with SPF should not replace sunscreen, so keep your regular sunscreen step even when your complexion product includes SPF.
How do I keep highlighter from emphasizing skin texture?
Use a small amount of finely reflective highlighter, blend its edges, and skip areas where you would rather not draw attention. Chunky sparkle or a thick layer can make texture stand out more. Try the product on one small area first, then check it in natural light before adding more across your face.
Can powder products still create a dewy-looking makeup look?
Yes, powder products can still work with a dewy-looking makeup look when you keep their placement selective. Choose finely milled or luminous formulas if you want a softer effect, and avoid layering matte powder over the whole face. You can use powder blush or bronzer while leaving the areas where you want radiance less powdered.
How often should I refresh dewy makeup during the day?
There is no fixed refresh schedule; blot or touch up when your makeup looks or feels like it needs it. If your T-zone feels slick, press blotting paper onto the area and lift it away instead of rubbing. Add a light mist only if the finish feels dry or uneven, and let it settle before touching your face.


2 thoughts on “Glowy Makeup Looks: How To Create A Dewy Finish At Home”
Comments are closed.